
Sorry, this entry is only available in Italian.
(Italiano) Pound cake al limone e cardamomo


I read in an article a while ago that prejudices can be useful sometimes – especially when facing unprecedented, possibly dangerous, situations. Prejudices give us, in some sorts, a pre-digested knowledge of anything, and it may be a good starting point. But avoiding making discernments on our own is a crime.
I don’t understand how can one possibly give up freedom of reasoning, of building their own ideas on anything. It requires study and effort, oftentimes. But it is far much better than being stuck on the doorstep, saying no in principle, giving up the use of one’s brain because someone already thought in your place (often badly).
This is the story of this truly simple recipe. It came out from an idea I stole from Sara of @shanty_la_gatta IG profile, who made a terrific tart with the balsamic vinegar. At the beginning I wondered about the use of balsamic vinegar in desserts – but clearly the answer was yes! That’s how I thought of balancing the sourness of the balsamic vinegar with panna cotta, that is quite sweet and velvety. And that’s where the magic happened.
The recipe is the one of the panna cotta you can see here. The balsamic vinegar sauce I created on the spot. To make it more aromatic, I roasted the nectarines with rosemary, which goes along great with peaches. This is all to serve you this yogurt panna cotta with balsamic vinegar caramelized nectarines and rosemary. If you want to take my advice, make use you use white balsamic vinegar, it will give you a wonderful golden syrup that will be perfect for your food photography! If you don’t find it, at least remember to remove most of the peaches you want to use as topping from the vinegar soon after cooking, so they will not absorb all of the colour and will remain nice and yellowy.
Ingredients (serves 4)
125 ml fresh cream
125 ml milk + 4 tablespoons
4 gr di gelatine
60 gr powdered sugar
190 gr greek yogurt
zest of half a lemon + 2 tablespoons of juice
50 gr balsamic vinegar
1 teaspoon powdered sugar
2 tablespoons honey
Fresh rosemary
Preparation
Let the gelatine soak in cold water – minimum time depending on the instructions on the gelatine case.
Pour the milk into a small casserole with the fresh cream and bring it to simmering point.
Take it off the stove and add the powdered sugar; stir well to prevent lumps.
Then add the zest and the lemon juice, stir and let it sit to cool down.
When lukewarm add the greek yogurt and stir well again.
Lastly, squeeze the gelatine, put in it a small pan with a couple of tablespoons of yogurt, and just after it’s melted pour it into the cream. Mix well and then pour the cream with the yogurt in glasses or other moulds of your choice and let it sit into the fridge for at least 4 hours. I let it cool well overnight, and it worked just perfectly.
Whilst the panna cotta cools down, put in a baking tray the nectarines, sliced in about half centimetre think slices. In a small bowl mix the balsamic vinegar, the honey and the powdered sugar and mix well. Then pour over the peaches, spread the fresh rosemary on top at bake at 200 degrees Celsius for 30 minutes.
Once baked, remove the nectarines and let them cool at room temperature on one side. Then sieve the caramelized balsamic vinegar and set aside to cool down too.
Take the panna cotta glasses out of the fridge some 5 minutes before serving, and serve it with a few spoonful of vinegar balsamic sauce, some nectarine slices and a bit of fresh rosemary.
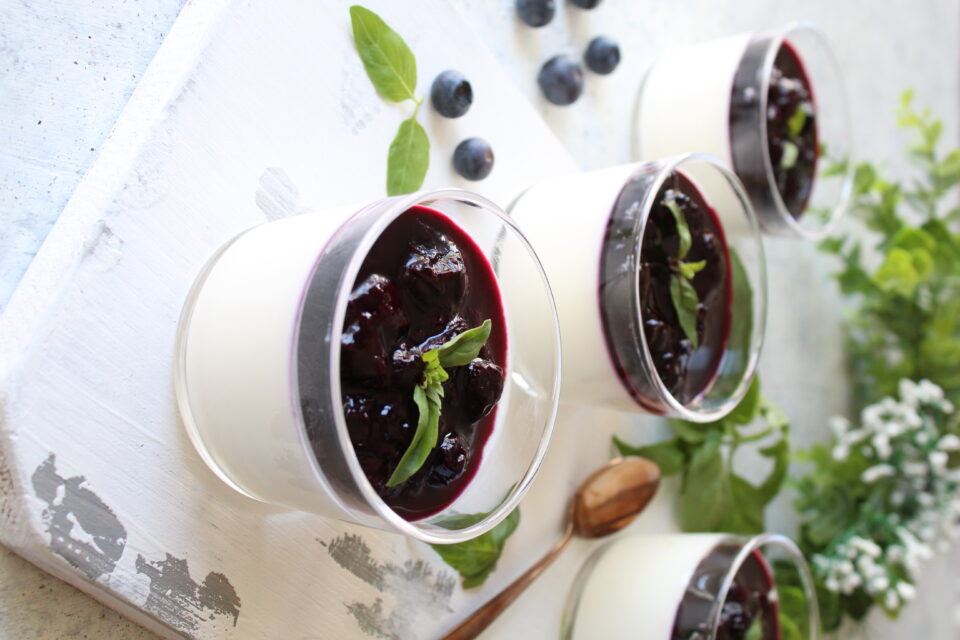
A simple to make, no fuss recipe to prepare a delightful panna cotta with yoghurt and a blueberry and basil sauce topping.
You need not many ingredients to prepare it and the results will be totally brilliant.
Ingredients (serves 4)
125 ml fresh cream
125 ml milk + 4 tablespoons
4 gr di gelatine
60 gr powdered sugar
190 gr greek yogurt
zest of half a lemon + 2 tablespoons of juice
125 gr blackberries
1 tablespoon powdered sugar
Juice of half a lemon
1 teaspoon vanilla extract
2 basil leaves
Preparation:
Let the gelatine soak in cold water – minimum time depending on the instructions on the gelatine case.
Pour the milk into a small casserole with the fresh cream and bring it to simmering point.
Take it off the stove and add the powdered sugar; stir well to prevent lumps.
Then add the zest and the lemon juice, stir and let it sit to cool down.
When lukewarm add the greek yogurt and stir well again.
Lastly, squeeze the gelatine, put in it a small pan with a couple of tablespoons of yogurt, and just after it’s melted pour it into the cream. Mix well and then pour the cream with the yogurt in glasses or other moulds of your choice and let it sit into the fridge for at least 4 hours. I let it cool well overnight, and it worked just perfectly.
Passing on to the sauce, wash the blueberries and put them into a small casserole with the powdered sugar and the lemon juice, the vanilla extract and the basil leaves. Let it cook gently for a while, softly squeezing the blueberries when they start getting creamy. Let it on the stove until a thick syrupy sauce forms. Then remove the basil leaves and let it cool down.
Serve with the blueberry and basil sauce on top.
This is quite a peculiar year for many reasons. The pandemic turned our life upside down, and from now on whenever we make a reference to anything, we’ll just acknowledge a before and after. Many of us are striving to go back to their life before, this meaning going out, seeing friends, go clubbing perhaps.
In June Italians usually start discussing about their upcoming summer holidays, and this too is a way to go back to before. We would all need a good vacation. A vacation from fear, sadness, from the signs that lockdown left on us. Mid June is also generally acknowledged to sign the beginning of the swimsuit season, the beginning of the harshest dietary restrictions to fit in the bikini of twenty years before.
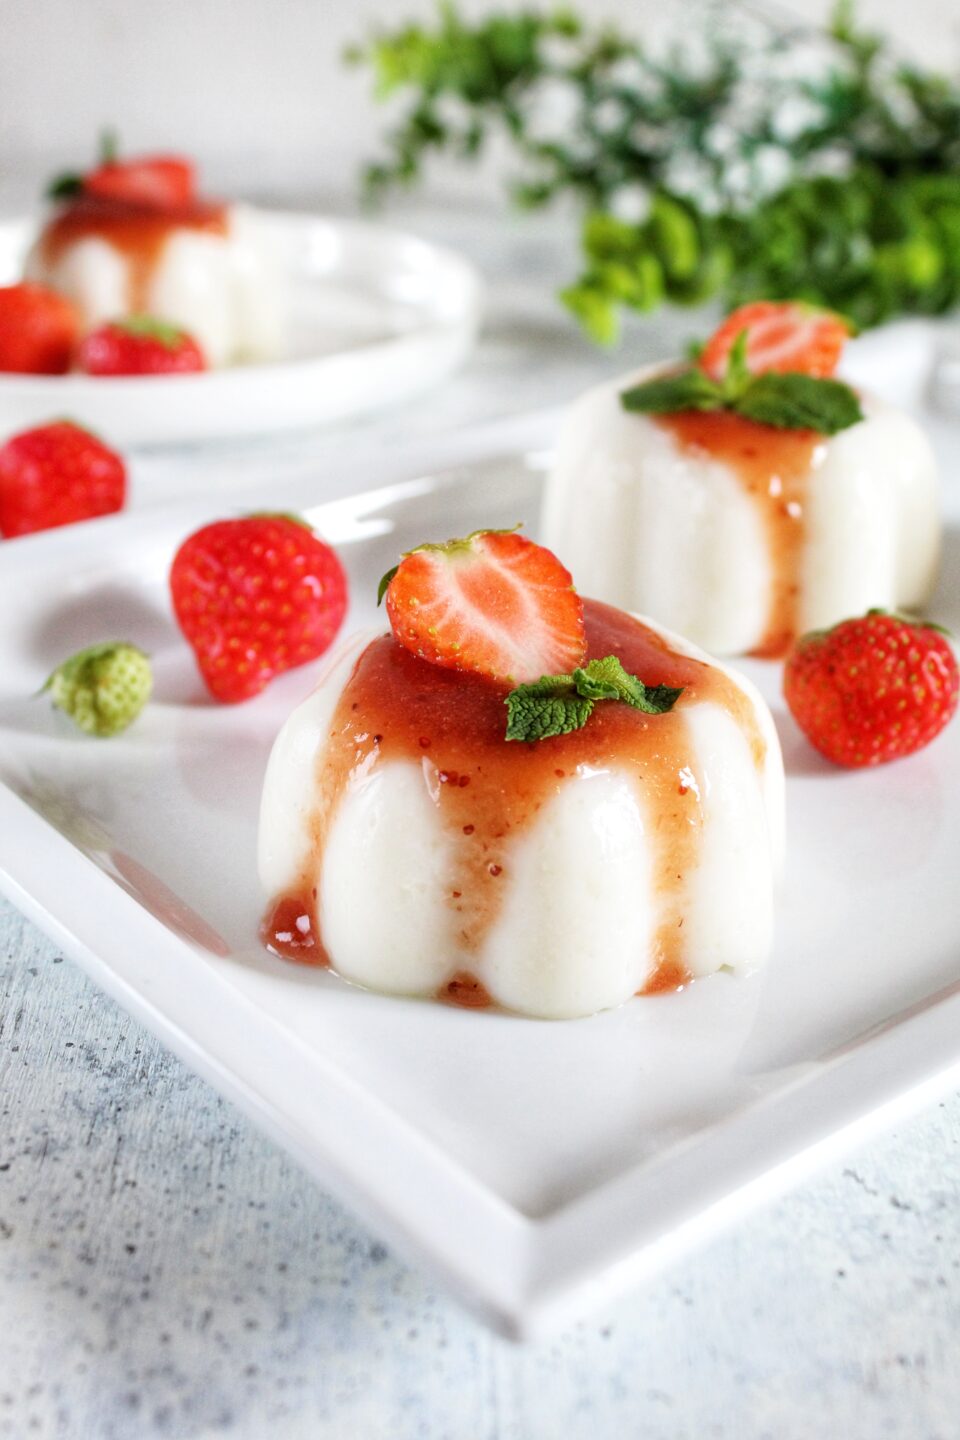
I wish everyone could finally fit in their own bikinis, and go back to our wonderful Italian beaches, and for this I am leaving you a low calories dessert to indulge on after lunch or dinner.
The almond puddings with strawberry coulis (but you could use raspberries, or any other berry) are also gluten and dairy free, so they’er perfect for vegans and for most of the people suffering from food allergy. They’re ready in no time at all, so no more excuses for this – you’ve got to try them!
Ingredients:
500 gr almond milk
30 gr almond flour (or almonds)
90 gr caster sugar
50 gr corn starch
50 gr strawberry jam
Juice of one small lemon
Procedure:
Heat the almond milk in a casserole.
In the meantime, put into a bowl the dry ingredients – that is almond flour, corn starch and sugar.
If you use almonds, you should finely chop them in your food processor with the sugar, then add them to the corn starch
As soon as the milk starts simmering, pour it onto the dry ingredients, and mix well to avoid lumps.
Use a hand whisk, if you have one.
Pour the mixture into the casserole again, and cook for a few minutes, until it starts thickening.
That then the casserole off the heat, and pour the mixture into the moulds of your choice.
Let them cool down a bit then put them into the refrigerator for at least three hours.
You can now prepare the coulis. Punt the jam into the blender jar together with the lemon juice (filtered) and blend it for a few seconds.
Put the strawberry sauce on top of your almond puddings and serve.
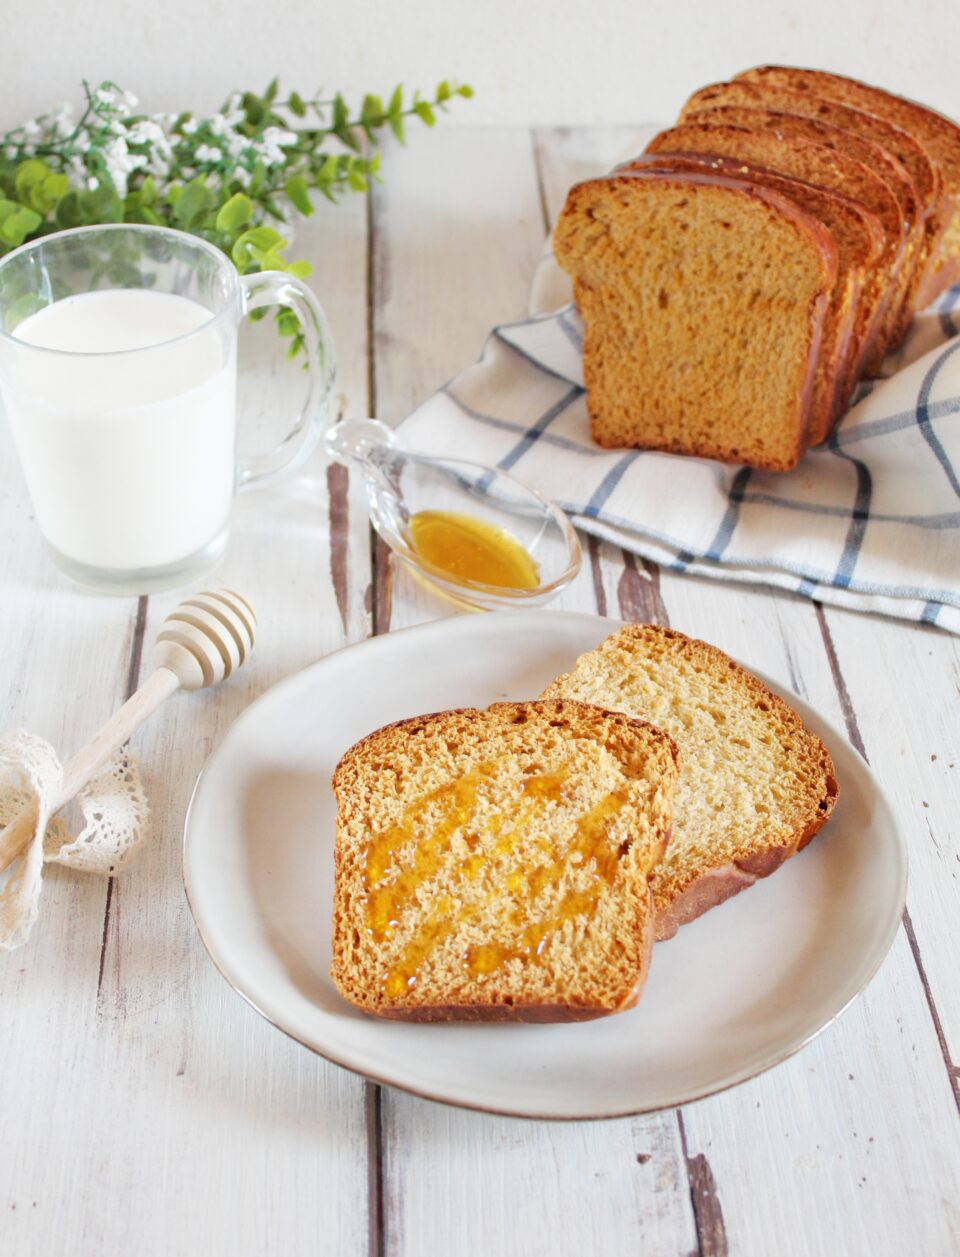
Here’s one for you, my English reading visitors. How would you translate fette biscottate? I hear someone says rusks, others Melba toasts, although I am pretty sure none of them fits for the purpose. You simply don’t eat them, and they may as well be an Italian tradition, one that certainly comes from the times when we were poor(er) and we toasted stale bread to make it edible for another while.
With time it evolved into a typical breakfast food, spread with jam, honey or whatever you like. If you happen to be pregnant and have morning sickness, this works too, apparently.
Whatever the name, it is halfway between simple bread and a brioche bread, and in this dairy free version it is good for everyone. If you don’t like having it too toasted and crispy, you can skip the last passage, and simply toast it every morning. In that case, it’s not fette biscottate anymore… but that’s another story!
Ingredients:
500 gr semi refined flour
225 gr water
75 gr caster sugar
5 gr salt
12 gr fresh brewer’s yeast
4 spoons of vegetable oil
1 teaspoon barley malt
vegetable milk (or normal milk if you like)
1 egg (separate whites from yolk)
Procedure:
First thing dissolve the yeast and the malt into 200 gr water (keep the remaining 25 gr for later). Let it rest for 5 minutes.
Put the flour, the sugar, the oil, the egg white in a bowl (you can use the kneading machine, it’s much easier) , mix it together and the add the water with the yeast. Keep on kneading for a few minutes, then add salt, and keep on kneading.
If the dough is too dry add the 25 gr water you left behind.
After about 15 minutes the dough should be soft and smooth, with no lumps.
Let it rest for about 30 minutes, then form three balls and let them rest for 15 minutes.
After that put the dough into a pound cake baking tray covered with parchment paper. Brush the surface with the egg yolk to which you must add some two or three tablespoons of milk (or plant milk). Let it raise for one hour covered with plastic wrap.
After one hour, take off the wrap, brush again with the egg yolk/milk mixture and put into a pre heated oven at 200 degrees celsius for about 30 minutes. Please check it doesn’t get too dark on the surface. if it does, simply cover it with aluminium foil, and continue the baking.
After 30 minutes, lower the temperature to 180 degrees and finish the baking (it’s going to take another 15 minutes).
Let it cool before removing from the baking tray, then let it dry well for about 12 hours.
After 12 hours you can cut the bread in slices, about 1 cm thick, lay them on the baking tray covered with parchment paper and toast them in the oven for 1 hour at 140 degrees. Turn them after 30 minutes.
Let them cool before tasting.

I remember that, when I was a child, my group of then friends and I were experimenting the first moments of independence. In the summer, soon after the end of the school, we used to meet in the mornings in the communal courtyard and we went all together to the baker’s on the top of the street to buy the bread for the day,
There ten girls of approximately the same age, between the end of elementary school and the first years of junior high.
Every family had its own bread, every day the same.
One of these families used to buy bananas, which is not the fruit as you may have thought, but a shape of olive oil bread which vaguely bore a resemblance to a banana. I remembered this when I was preparing these olive oil bread rolls from the well-known Roman baker Gabriele Bonci, who first prepared them live during a TV show on the national broadcasting television, and ever since they have been a popular hit in every Italian household.
These bread rolls have a nice little crust and a lot of soft white part, and they are a hit when stuffed with salami or cheese, but they go as well with butter and jam. Honestly, I have them plain, they’re so delicious!
The preparation is quite simple, if you have a kneading machine it’ll do the work for you.
Are you ready to taste this bakery Italian delicacy?
Ingredients:
500 gr bread flour
275 gr lukewarm water
10 gr sugar
10 gr salt
5 gr fresh brewer’s yeast
35 ml olive oil
Preparation
Dissolve the yeast in the water with the sugar. Stir well.
Put the sifter flour into the kneading machine bowl, or on a working surface if you haven’t the machine, e pour the water with the yeast little by little, and start to knead. It will take about ten minutes to have a nice dough. Then add the salt, and the oil as final ingredient. Pour it into the dough little by little, allow it to absorb pretty well- you will need another 10 minutes of kneading for this. The dough will be slightly sticky, but it was to be.
Oil a clean bowl and put the dough in it covered with cling foil, and let it double (when it is warm it should take two hours, if it is colder you may allow it 3 hours to rest).
Take the dough and using a rolling pin roll it out about half a centimetre thick. Cut then even stripes of dough (I got away with 8 stripes), lightly wet them with water and roll them up, forming little cute bread rolls.
Put the bread rolls onto the baking tray covered with parchment paper, cover them with cling foil again and let them rise for another 90 minutes.
Preheat the oven to 200 degrees; put the bread roll into the oven, spray their surface before with some water (if you cannot spray them, pass a moist finger on the bread surface) and bake them for the first 10 minutes in the high part of the oven.
Then turn the oven down to 180 degrees and complete baking (approximately 15 minutes)
Let the bread rolls cool down on a grate before serving.

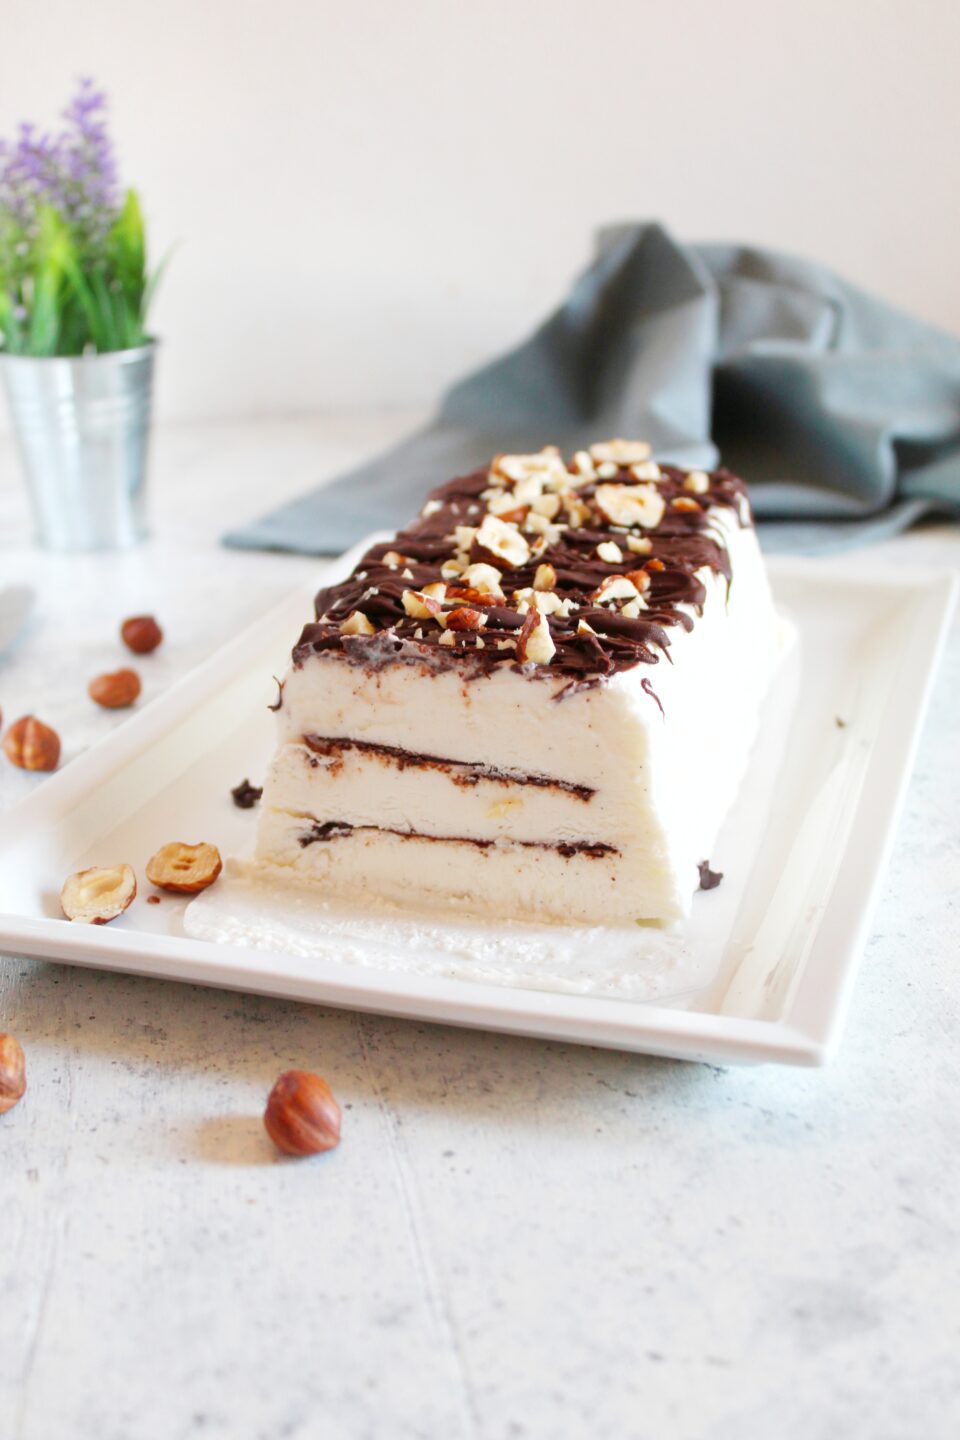
I’ve always loved the After Eight cookies, deliciously filled with mint and covered with chocolate. I loved them to stomach ache, and I have never eaten them ever since.
But the contrast between mint and chocolate is one of my favourites, and I have baked in time several tarts combining these flavours.
Mint and chocolate are quintessentially British, together with beans on toast and cream and strawberries. I went to London a couple of years ago and I found it culinary wise more European than its government would wish it to. I wonder whether it’s like this everywhere in Britain, or if in Bournemouth (where I studied so long ago) they keep on having those terrible cucumber sandwiches.
Today I am preparing for you a dessert embodying mint and chocolate in full. The mint and chocolate panna cotta joins together Italy and Britain, and it’s a perfect combination for flavour and taste. It’s also quite easy to prepare, and as summer is quickly on its way, it’s good to have a great recipe for a dessert which is fresh and full of flavour and does not require the oven.
What’s better than that?
Ingredients.
500 ml fresh cream
70 ml mint syrup
70 gr dark chocolate
5 gelatine leaves
Mint to decorate (quite optional)
Preparation:
Soak two gelatine sheets in cold water for about 10 minutes.
Then, put in a non-stick pan 200 ml of the fresh cream and the chocolate cut in chunks. Heat the cream until it gets to the simmering point, then turn the heat off and keep on stirring until the chocolate melts. Then add the gelatine sheets, well wringed out, and stir again until they dissolve.
Pour the cream in even parts in the glasses, and put into the refrigerator for half an hour to consolidate.
After 30 minutes, soak the remaining 3 gelatine sheets in cold water for about 10 minutes.
Then put the remaining cream in the non-stick pan with the mint syrup and bring it to simmering point.
Then turn the heat off, add the gelatine sheets (remember to always wring them out) and dissolve them in the warm cream.
Take the glasses with the chocolate cream out from the fridge, pour onto the chocolate cream the mint cream and put them again into the fridge for at least 2 hours (three would be better).
Before serving, you can sprinkle on top some grated chocolate and a few mint leaves.

There are two flavours that put together remind me of the summer, and they are lemon and lavender. I used the flowers of this plan on various occasions, but the combination I prefer is with lemon, and in fact I have used it time and again.
To be true, any excuse to open the envelope containing the lavender buds, and be surrounded by the memories of a summer in the South of France, with lavender fields as far as the eye can see, the light blue sea and a pair of espadrilles that I consumed as much as I walked around!
I returned to France several times, for work mostly. But more than Paris or the north, it is the South of France the place I remember more fondly.
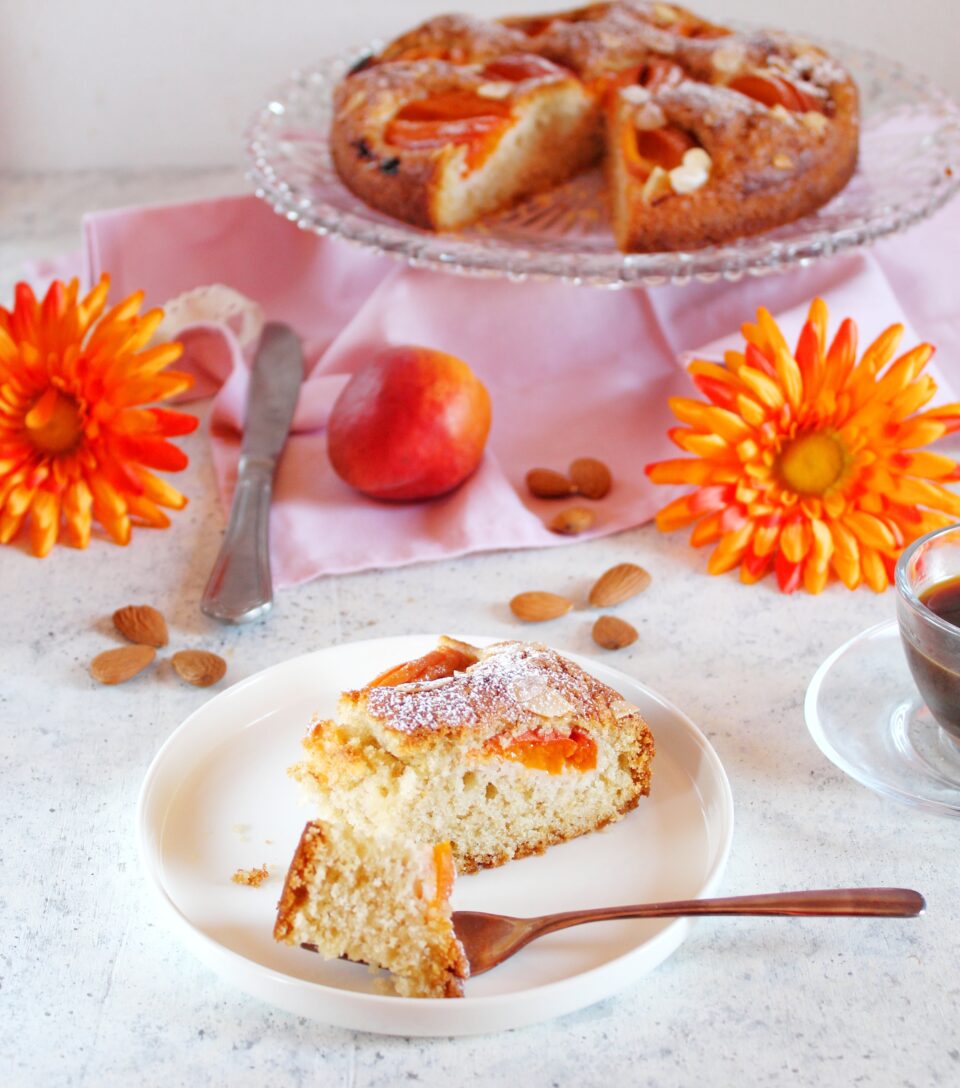
I let myself inspire by lavender fields to realise these mini pound cakes with lemon and lavender, a classic combination, that are so easy and quick that we can name it the last minute recipe. If you realise you’ve run out of breakfast stuff, this is the recipe that’s gonna save your day!
The basic recipe can be adapted to almost any combination of flavours according to the season. For the end of spring, lemon and lavender are just perfect.
Ingredients:
170 gr baking flour
40 gr rice starch (or another starch)
100 gr sugar
8 gr baking powder
2 medium range eggs
40 ml lemon juice
Zest of a lemon
60 ml sunflower oil (or any other vegetable oil)
1 teaspoon of lavender buds (edible)
Procedure:
Sift the flour and the starch with the baking powder and set aside.
In another bowl, beat the eggs with the sugar until they are very fluffy and pale. It’s going to take about ten minutes, depending on your mixer.
After that, incorporate the flour and the oil (alternating them) with the help of a spatula. Keep on until both ingredients have all been amalgamated.
Them, pour in the lemon juice, the lavender buds and the zest of the lemon. If you see that the batter is too thick, add some more lemon juice, or a few drops of water.
The batter must be quite firm, but slightly soft as well.
Fill in the mini pound cake moulds for something more than a half of their volume, but please pay attention that they’re not overstuffed and we dn’t want them to overflow.
Preheat the oven at 180 degrees, and when it reaches temperature bake the mini pound cakes for about 25 minutes. I sprinkled some granulated sugar on to for a more breakfast feel, but you can do without it as well.
Let the mini pound cakes cool on a rack